Posts tonen met het label Battle Reports. Alle posts tonen

zondag 13 maart 2022

Les Avant-Gardes - LaSalle2 battle report

After a few years of not using my 28mm Napoleonics they are finally getting some table time again with LaSalle2. We've been having an absolute blast with these rules ever since we started using them. They are well written, the battles are dynamic, packed with tough decisions and surprising moments.

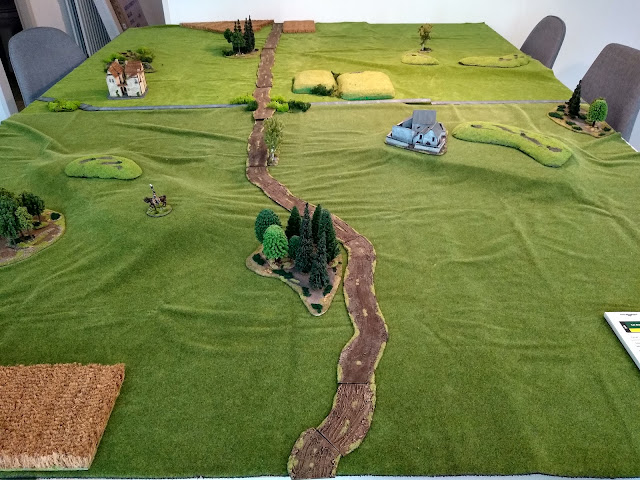
The scenario we played was the first one from the book, Les Avant-Gardes. Two villages lay opposite of each other across a stream. Both the villages and the stream crossing are scenario objectives. The game can also be won by reducing the enemy by 1/3 of his strength. For this game we doubled the recommended table size, which gives a bit more room for outflanking manoeuvres. 

The Russians enter the battlefield with two infantry brigades, one of which are elite grenadiers. The French start with an infantry brigade and a light cavalry brigade. both armies move up and clash over the stream. The French light cavalry starts to move around the flank of the Russian grenadiers. Tremendously effective fire from the Russian artillery batteries takes out both of their French counterparts in turn one. Given this initial success the Russians press the right flank but are rebuked and eventually repelled by the French heavy cavalry. At this point casualties are starting to mount on both sides and the French light cavalry is posing a serious threat to the Russian rear. Trying to turn the tide of battle, the Russians launch one of their grenadier battalions across the stream against two French battalions. To everyone's surprise both French battalions break under the Russian onslaught and the French army is defeated by a sudden death victory for the Russians. 

Once again a very fun game and a strong motivator to get those last few Russian units painted. 


dinsdag 24 april 2018

A return to the blog - Black Powder and Hail Caesar

Greetings reader!
It has been a while since my last post, more than two years actually. Recently I've been picking up some more steam with the hobby, resulting in miniatures painted and battles fought!

Here are some pictures of this weekends wargaming, involving Black Powder and Hail Caesar. 
For my Black Powder armies (got to provide both sides) I'm working on a Russian and a French. I recon I'm about half way collecting and painting, having six infantry units ready for both sides. Also I think I've settled on a basing method, 4 per base on a 1,5cm frontage, with the depth of the base varying between 3 and 4,5cm. All my Russians are now based in that manner, and the French are up next for base-surgery.

The battle involved 6 infantry units a side with a artillery battery and a unit of hussars, two brigades for each player. Because of the small game size in Black Powder terms I decided to double the stamina values for all units. This seemed to work out well, causing some more eb and flow in the development of the battle. Also I decided broken brigades would be allowed to be rallied, but in the end the situation didn't come up. Lastly we used the Hail Caesar rules for disorder, calling for a special break test on the roll of 6 during shooting instead of causing disorder immediately. This caused some harrowing moments when the Russian grenadiers went in for a final push against one of the French brigade and closing fire caused them to fall back disordered. I'm not quite decided on what I think about this effect as in the standard Black Powder rules it would never occur. It does make charging that more dangerous! In the end the Russian main assault on the French center faltered and the French were able to crush the Russian right flank, breaking my last brigade.


Next up some Hail Ceasar game. This is the first time I actually played the game, after having the book for some years now. Inspired by using the break table in Black Powder I did a little test run with some Old Hammer models which turned out quite nicely. I then proposed to give the game another go with my friend and most regular opponent Guy who was happy to comply. Thus we dusted of those veteran soldiers of the Empire and threw in some Bretonnians to make two nice armies of 6 infantry, 3 ranged infantry and 3 heavy cavalry units. Those were quite sufficient to fill a 4*6 table and it was a great game. 
My Knights of the Realm met with initial succes, breaking the enemy left flank infantry brigade, while his knights came crushing down on my left and center. This caused the balance to tip over in favor of my opponent. My general made some heroic charges but went down in the melee. His second in command did the same, and found the same fate. In the end the army was led by the lowliest clown, which caused a general rout.
Great games all in all and I hope to return this blog more often than I've done in the last couple of years. Cheers to you all. Also please leave a comment when you've enjoyed the photo's!


zondag 31 augustus 2014

Pike and Shotte - The Battle of Pavia

In between the smoke clouds of Black Powder I recently had a game of Pike and Shotte. We played the battle of Pavia from the rulebook, mostly using Warhammer Empire models. We had to scale the battalia's down a bit, but still managed to fill the table with an impressing amount of mini's!

Here are some pictures I took with my phone.

French positions

French left flank and Imperial right flank
Imperials in front of 'the river'


the assault commences

Imperial right flank takes up positions

French cavalry counter deploys

Heavy siege guns pound the French

Infantry gets stuck in

on the roll of a 3+...

battle lines clash in the swamp

In the end we decided the Imperials had a five point advantage, holding the French hq and being within reach of the Imperial objective to warn the Pavia garrison. All in all a very enjoyable game.

maandag 17 maart 2014

Battle of Turovo

Here's a quick impression of a recent Black Powder game. The scenario used is an adaptation of http://www.warlordgames.com/battle-report-the-battle-for-st-piere/ using smaller forces. In our case it pitted the French against the Russians on the way to Smolensk.

French:

Advance guard
4 infantry regiments
1 artillery battalion
1 regiment cuirassier (small)
1 regiment hussars

Main body
5 infantry regiments
1 artillery battalion
1 regiment cuirassiers

Russians:

Garrison
3 infantry regiments
1 artillery battalion
1 regiment cuirassiers (small)

Outlying force
2 infantry regiments
1 Jaeger regiment
1 artillery battalion
1 regiment cossacks (small)
2 regiment hussars (small)

The first few turns saw the French advancing towards the river. Making contact with the Russians on the left side of the village. In the end the French left flank was compromised, but the cavalry managed to protect the main assault, and one regiment could cross the river to encircle the Russians. When the main attack was launched the village was soon captured. Victory to the French.

The advance guard swings left

Russian possitions in the river delta

Russians possitions in the village

The French left flank makes contact

Russians finaly line up a shot

The advance guard is pushed back

The main force arrives

Cavalry hold the flank

The river is crossed


zondag 22 december 2013

Battle of the monastry of Saint-Cyr

For our third Black Powder battle we decided to use a flames of war scenario, mainly to have some guidelines for deployment and reinforcements. The scenario was dust up, where each player starts in an opposing table quarter defending an objective. Reinforcements arrive from the third turn from the other corners.

Here we see the British brigade deployed around the remains of the monastery of Saint-Cyr. 3 regular infantry and a unit of foot artillery.


In the opposing corner the french have deployed around their objective, the barn, filled with precious supplies. In the first two turns the French move up to put the pressure on the British. One of the British units responds fast, but is left unsupported.


The second French brigade arrives from reserve, and marches on the monastery.


Battle lines are drawn


The British fail to organize the thin red line, and the first unit is disordered.


The French cavalry brigade arrives and starts a move on the British left flank.


French infantry columns march on swiftly, but don't deploy in line yet. In the next turn British artillery fire badly damages the front of the column, disordering the first unit.


The first British reinforcements arrive. The cavalry brigade deploys to relieve the center.


French cavalry prepares to charge the ruins.


Finally the third brigade arrives, the notoriously late Austrians.


Cavalry charges force the center units into squares. A head-on cavalry charge proves to be to much for the shaken square, which is destroyed.


Infantry charges the ruins, but the British defenders hold their ground.
The French cavalry turns their attention to center, where the British guns are destroyed by gunfire.


The Austrian brigade starts to threaten the French left flank, but their progress is slow.


French cuirassiers are destroyed batteling the British cavalry.
French hussars charge the British cavalry, chasing and destroying them.


Here we decided to end the game. The British had two broken brigades and the French were firmly in control of the monastery. We thought the FoW scenario worked really well. Next time we might try one of the others!

zondag 21 oktober 2012

Gepanzerte Panzergrenadiers vs. Grenadier guards/Airlanding FoW Batrep

Yesterday Peter, Guy and I met up for a second battle. Peter once again ran his gepanzerte panzergrenadiers,  but this time Guy took his Grenadier Guards and I took my airlanding.

General overview of the forces:

Germans: Totenkopf" SS-Panzergrenadierkampfgruppe.
HQ (2 panzerschrecks, 3 halftracks) 
Gepanzerte panzergrandier platoons 
Gepanzerte panzergrandier platoons
1 Panzer platoon (4 Stug G)
1 Armoured anti-aircraft gun platoon (2 armoured sd kfz 7/1)
1 Armoured mortar platoon (HQ, 2 observers in kübelwagen, 4 sd kfz 251/2)

British: Grenadier Guards combined with 1st Airborne
This time we played the British as one company, only using the airlanding HQ

Grenadier Guards 
Motor Rifle platoon I
Armoured platoon (3 Sherman, 1 Firefly)
4 Sextons

1st Airborne HQ
Rifle platoon I
Light tankplatoon (3 tetrarchs)
HMG platoon (Vickers)
AT platoon (6 pdrs)

The battle takes place once again somewhere in Normandy, despite the fact that the Germans are organised in an eastfront roster. The British find themselves once more on the defensive, facing a full force of gepanzerte panzergrenadiers. The objectives were placed on the west end, with Germans approaching from the east (pincer scenario). Para's hide in the woods, while the sextons prepare their barrage. The third platoon that starts on the table are the 6pdrs in ambush.


British positions ()
German positions (east)


In their prepared positions the British can't do more than wait and hope to stem the German tide long enough for their reinforcements to arrive.


Did we hit them? Did we?!
Hold on to your hats men!

Halftracks race through the little, quintessential french village, only to receive the full force of 4 six pounders opening up on them. The result is devastating for the halftracks, but the grenadiers press onward.


The stuggs on the northern flank swing to the center, which proves to be their undoing. After 1 of the tanks is destroyed and 1 bailed out by combined fire of sextons and a six pounder, the stuggs present an easy target to charge for the nearby infantry. After the paratroopers destroy the 2 remaining stuggs they can safely return to their foxholes with minimal casualties.


After their moment of glory, the six pounders are easily swarmed by the grenadiers, opening up the southern flank for the German infantry. Luckily for the British, reinforcements arrive in time to defend the objective.


Right on time chaps!


On the other flank some tetrarchs come up to harass the remaining halftracks, destroying them all.


The shermans park in front of the objective to screen it from the infantry. The Germans however are not yet considering a retreat, and boldly charge the tanks. The overconfident shermans pay the price and must retreat with 1 remaining tank.


Wir brauchen die panzerschreck!

Tanks go up in flames


At this point the only remaining German platoons are the kubelwagen scouts, the first in command and a grenadier command team. When the british receive their last reinforcements Peter reluctantly concedes the battle.

We once again played a very enjoyable battle, I hope you enjoyed the report too.